

I've spent the last few years experimenting with stain to transform vintage pieces--and I love it! Sometimes when we want to transform a wood piece, we grab our paint brush. Maybe it's because painting feels more familiar than using stain? I hope to sway you to try out stain next time you want to revamp something wood.
Here's 3 reasons that I 🖤 stain > paint
- Stain is easier to apply than paint.
Staining wood is super simple. Wipe the stain on with a cotton rag, let it sit for a bit, and then wipe off the excess. No need to be neat or overly careful (which is key if you are someone like me). No runs, no drips, just beautiful color that absorbs into the wood + allows the natural material to shine.
- No pealing or flaking--just pretty
The wear on stain is better than paint. Paint can chip or flake overtime or with poor application. Paint sits on the surface of the wood. Stain actually absorbs into the wood.

- Wood grain wood grain wood grain.
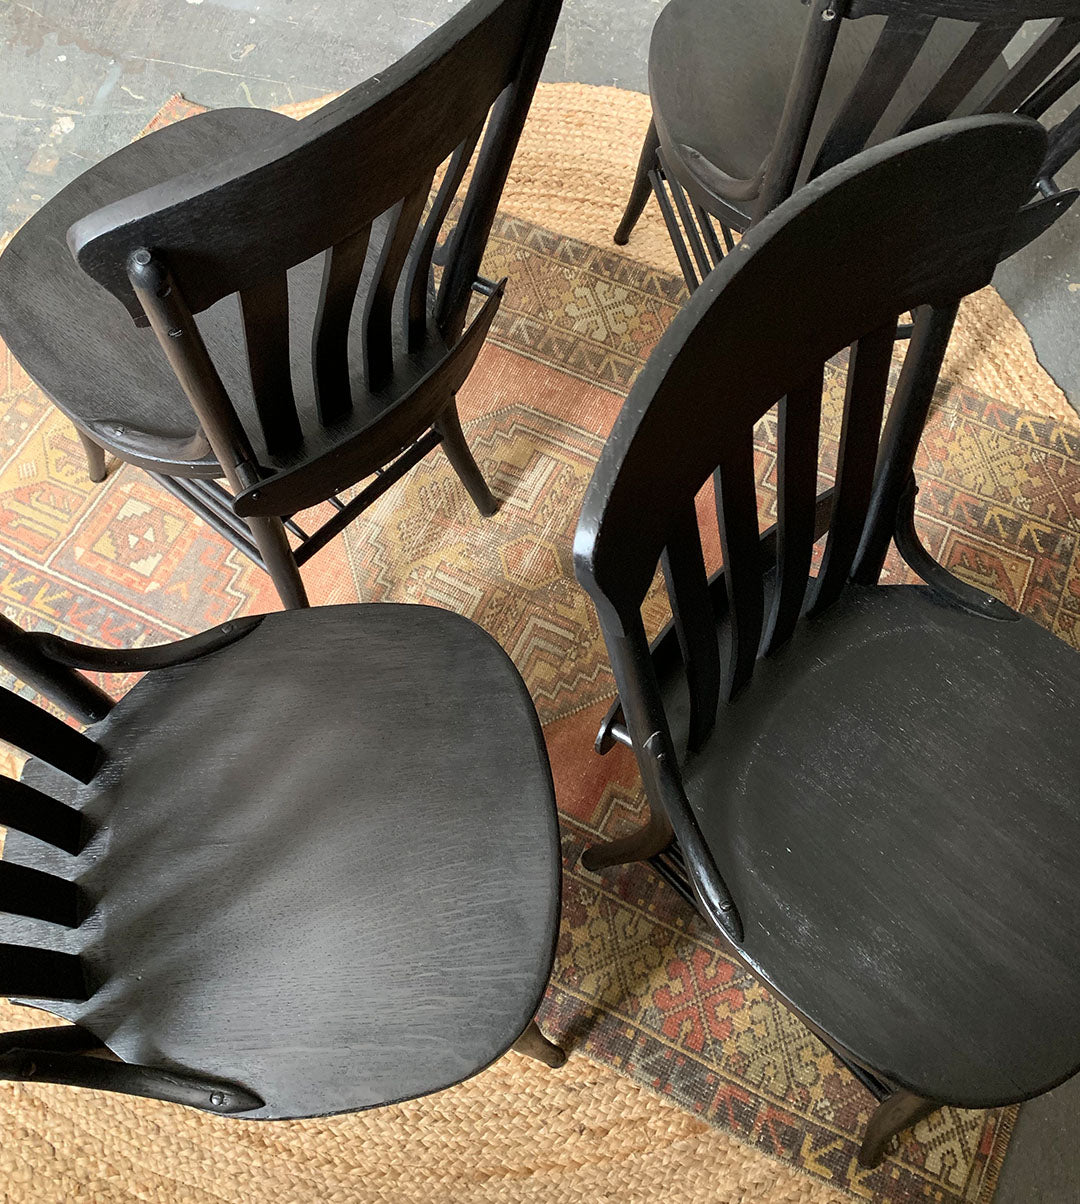
When you paint wood you completely cover the natural texture of the wood grain, which is kind of heartbreaking. Stain allows the natural wood texture to be visible. If you are looking for a pop of color, try out some color stains.
Ready to get started on your first stain project? Here's my stain application guide (plus a few tips + tricks).
- Prep your surface.
You can only stain bare wood. So to get started you'll need to sand any existing stain, paint or finish off the wood. Start with a rough, low grit paper and work your way up to a high grit paper like 225 for a smooth surface.

- Pick your stain.
I prefer working with oil based stains that aren't gel stain. Gel stain (check the label) is also oil based, but it's thicker and it's supposedly easier to get an even application. I recommend testing out a few sample pieces of wood with different stain options and colors before getting started on a precious project. The can photographed below is my go-to for a beautiful dark stain.

- Wipe the stain on + wait.
Wipe the stain onto the wood with a cotton cloth. You can use an old t-shirt or purchase a box of rags at your local hardware store. Apply one coat evenly across the wood surface. Let the stain sit for a short period of time, around 10 mins.
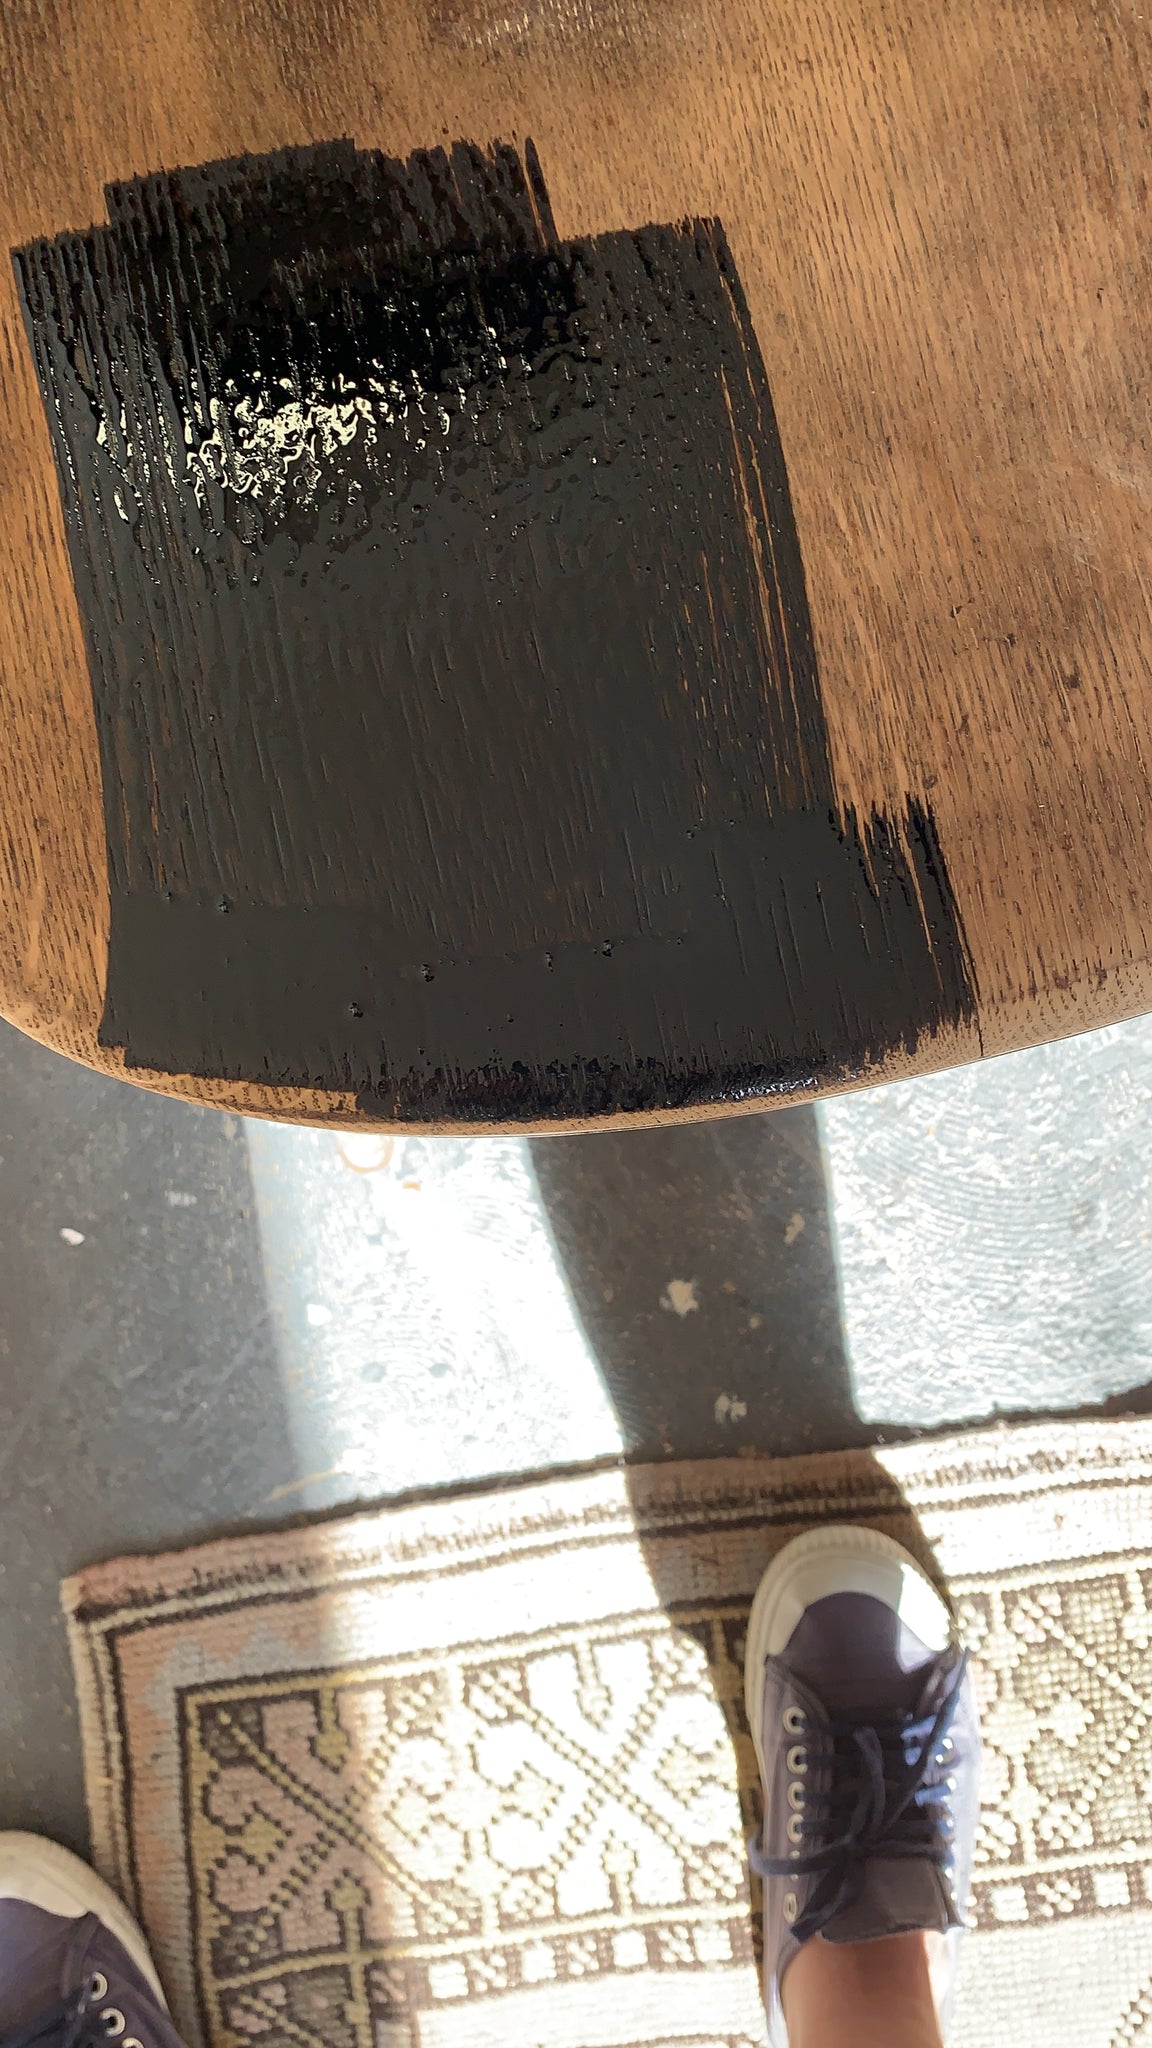
- Wipe the stain off.
Remove the excess stain (anything that doesn't absorb into the wood) with a cotton cloth. Once your rag is fully saturated with stain, use a new cotton cloth. If your surface is sticky, the stain has set up for too long. Next time, don't let the stain sit as long. You might need to sand down the surface before applying your next coat of stain. You want a matte look at this point.

- Let it dry + reapply.
Let the stain dry for 3 hours and the start the process over. It might take several coats before you get the coverage that you want.
- Fixes for inconsistent coverage.
On my first few stain projects, I put on too much stain and the wood grain was very shiny. In my most recent stain projects, I stained cabinet doors for our kitchen island. Some of the doors sporadically had something on them that blocked the stain from absorbing. So my coverage was uneven. In both cases, the fix is easy! Just lightly sand the areas down and reapply a thin coat of stain. Let it dry and reapply as needed.
- Add finish.
Your stain is the color that transforms the look of the wood. The finish protects the stain. There's several different types of finishes. Finishes that you brush on and finishes that you can spray on. I recommend testing a small area with your selected finish to ensure it doesn't yellow or change your stain color.
And there you have it!
Now you can get a completely different look for your wood pieces without losing all the character and charm of wood. I recently stained an inexpensive set of cabinets from a big box store. Once the space is finished, I'll share how they look in the space.
